For Contributors
A Step-by-step Instruction of Module Uploading
All examples will be shown on sample_module.x in English.
Preparing application
Before module uploading you shall create statically-linked binary file. On the Linux operating system you might check that you application is statically-linked by the following command:
$ ldd your_executable
So, for sample_module.x it should provide the next output:
$ ldd sample_module.x
      not a dynamic executable
In the case if you see something like that:
$ ldd sample_module.x
     linux-vdso.so.1 (0x00007fff8d28c000)
     libstdc++.so.6 => /lib64/libstdc++.so.6 (0x00007f9eb8de1000)
     libpthread.so.0 => /lib64/libpthread.so.0 (0x00007f9eb8dbf000)
     librt.so.1 => /lib64/librt.so.1 (0x00007f9eb8db4000)
     libm.so.6 => /lib64/libm.so.6 (0x00007f9eb8c6e000)
     libdl.so.2 => /lib64/libdl.so.2 (0x00007f9eb8c67000)
     libgcc_s.so.1 => /lib64/libgcc_s.so.1 (0x00007f9eb8c4c000)
     libc.so.6 => /lib64/libc.so.6 (0x00007f9eb8a7f000)
     /lib64/ld-linux-x86-64.so.2 (0x00007f9eb8ffe000)
It means that your application use dynamic libraries. You shall re-link it with -static flag.
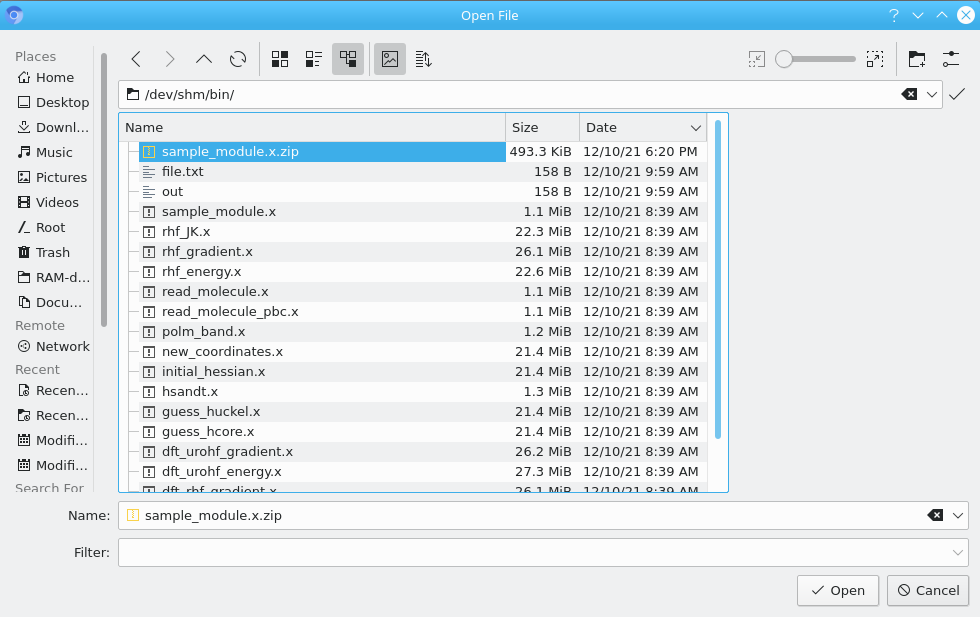
If you already have statically-linked application, you shall archive it. Youn need to zip-archive it before uploading to the Edison platform:
$ zip sample_module.x.zip sample_module.x
     adding: sample_module.x (deflated 58%)
It will be used in one of the stages below.
Warning
On the Edison cluster CentOS 6 is used over x86_64 arch, so that
static linking on modern systems leads to the error FATAL: kernel too
old. Please use older version of glibc during build process.
Uploading new applications
Firstly, you need to log-in to EDISON platform, and, then, go to MQCP Project.
You shall see the following screen:

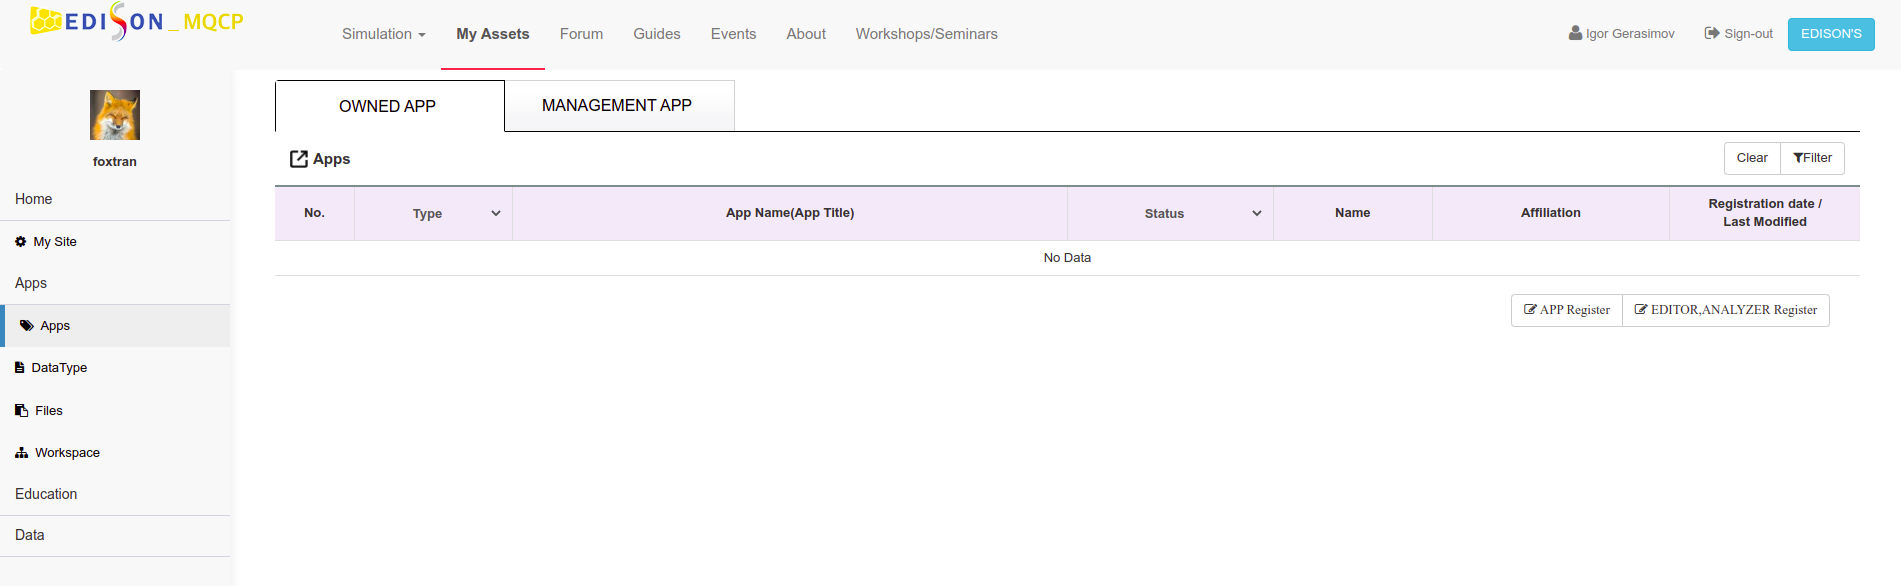
Navigate to My Assets tab to get to the following page:
Click APP Register for creating a new application and fill all the required
fields denoted by red star. On the next image, oqp_sample_module will be
created as an example.
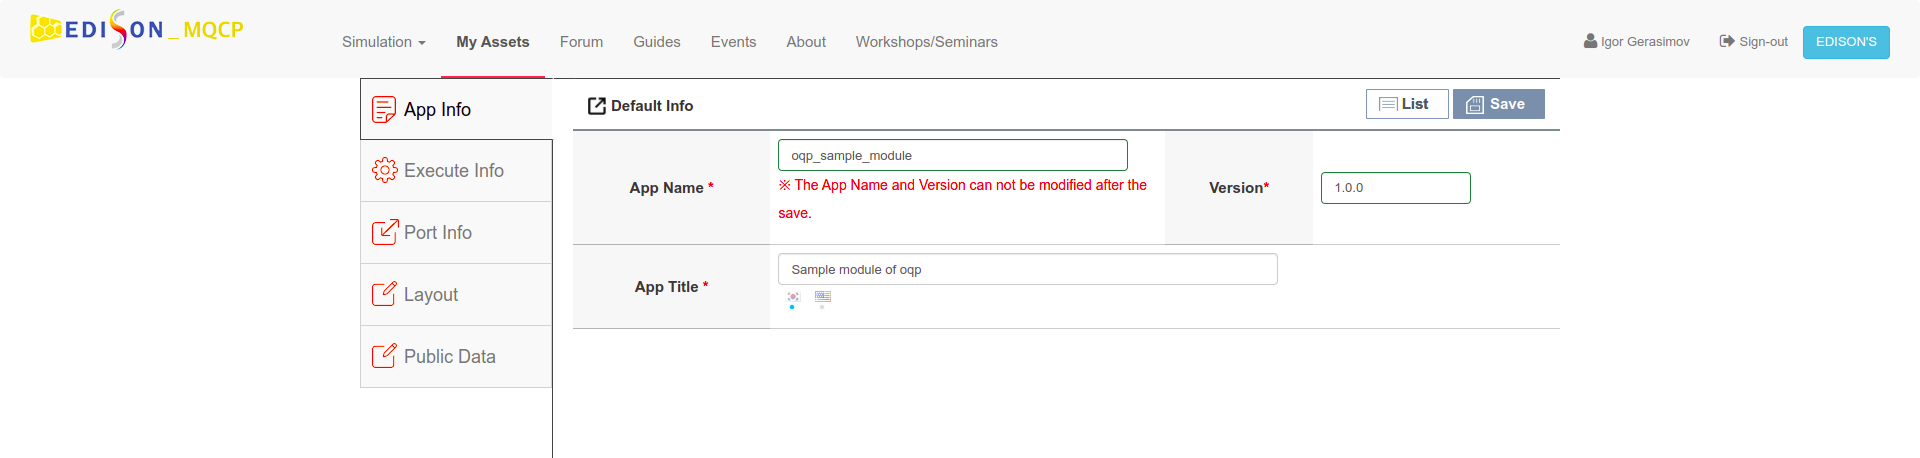
Click on save.
We advise to do it after editing every section.
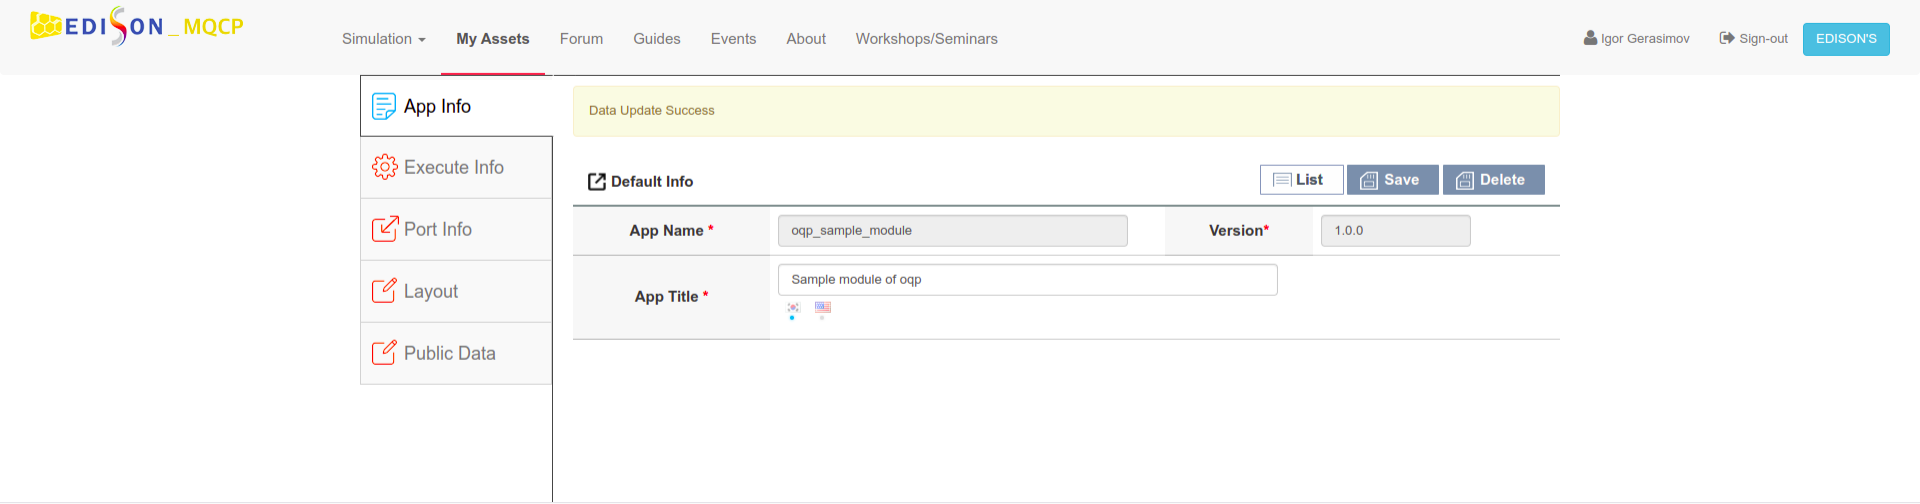
After clicking on save, normally you get the Data update success message:
Sometimes you can see the following errors:
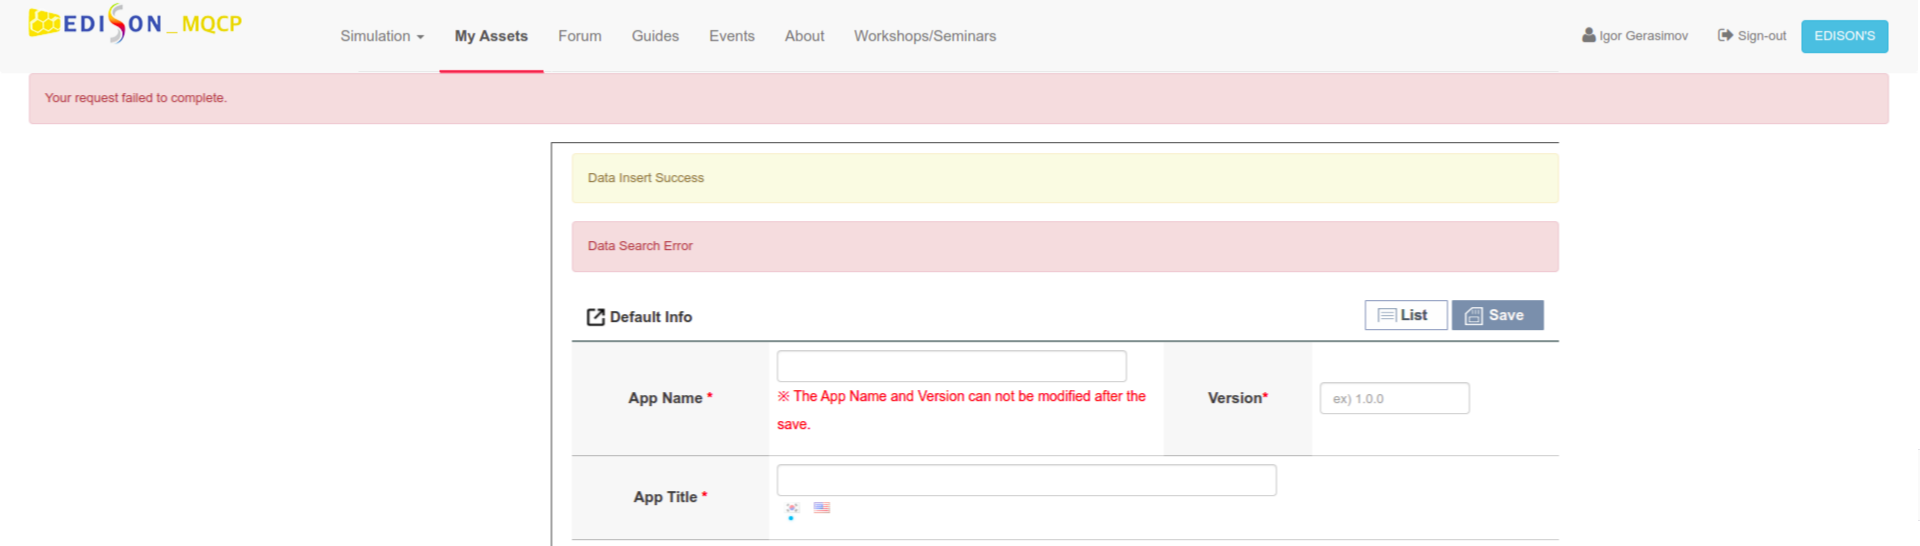
As it said, your data is saved, but you can not continue to modify it here. For continuing, go to EDISON platform:

And click on My EDISON tab. You will see your analytics of your account:

Then, click on Apps tab in the left-side panel. Here, you will see your new application:

Choose your application again and continue to edit it.
If it was not opened properly, try again.
When the data is loaded proceed to Execute Info.
Here, you should provide some information:
File Name. Name of executable file. In example, it is
sample_module.xOpen Level. Since we are using binaries, choose OPEN_BINARY
App Type. Choose one between
SolverandConverterRun Type. Choose type of parallelization.
New Cluster. Choose queue. It is needed for providing default queue.
Upload Case. Clean.
It should look so:

Now it is the time to upload the archived application binary we prepared before.
In this example we produced module_sample.x.zip as an
example.
You shall to upload your own archive.
In the end of this section you should see this:

In the next tab (Port Info) provide input and output parameters.
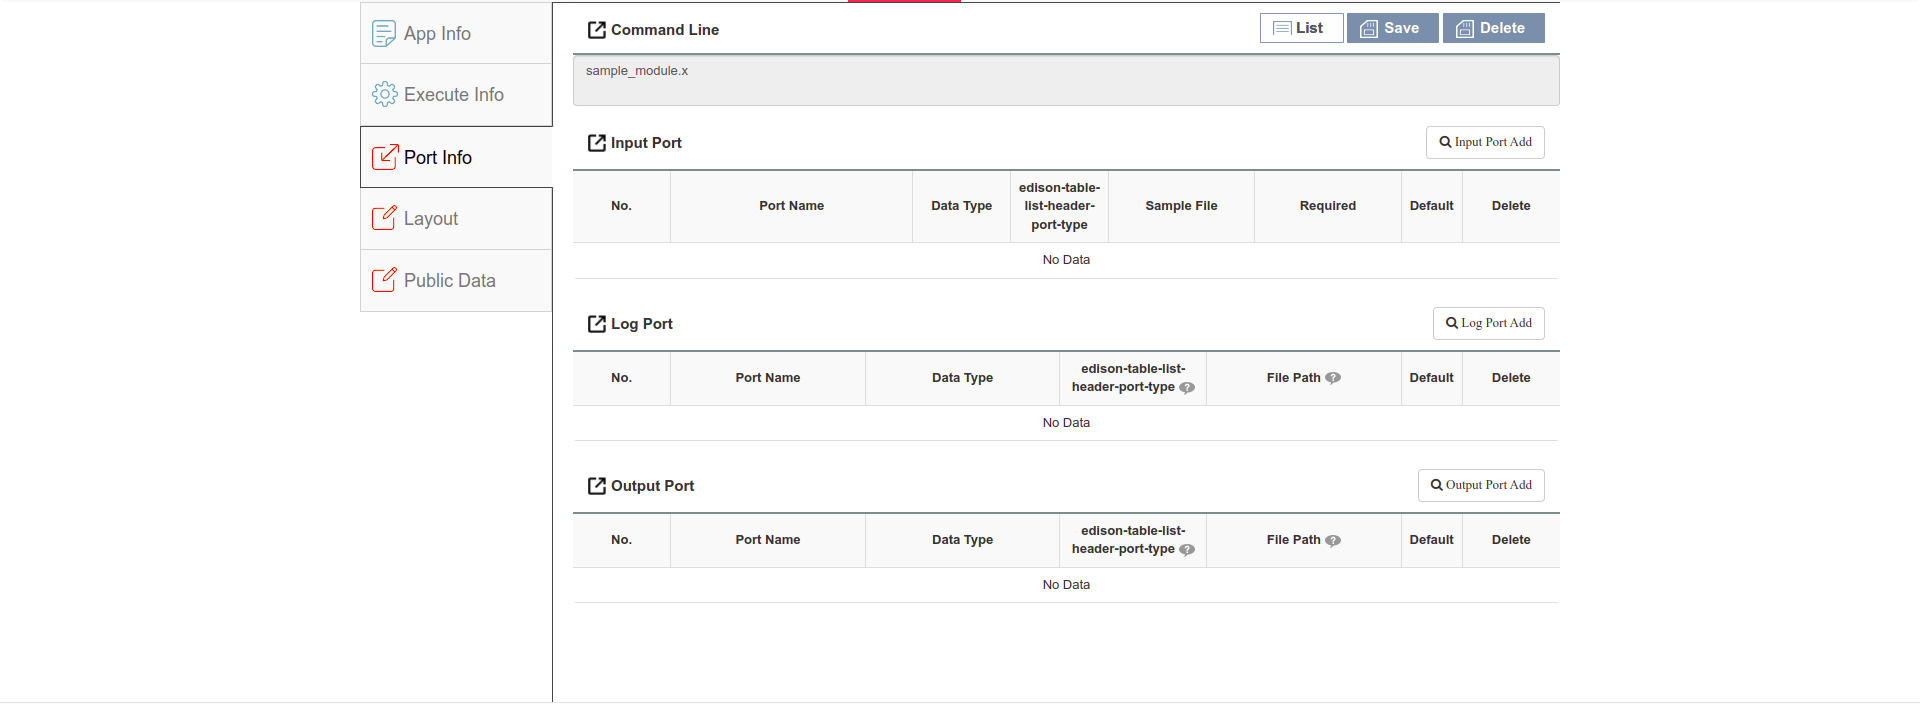
The Command Line field is the most important here, as it defines how you
application should be executed on the cluster.
For the sample application, let’s just add one input parameter.
Click on Input Port Add and provide an option here:

Then click Add to find the proper type of a file corresponding to this
option, which is used in your application.
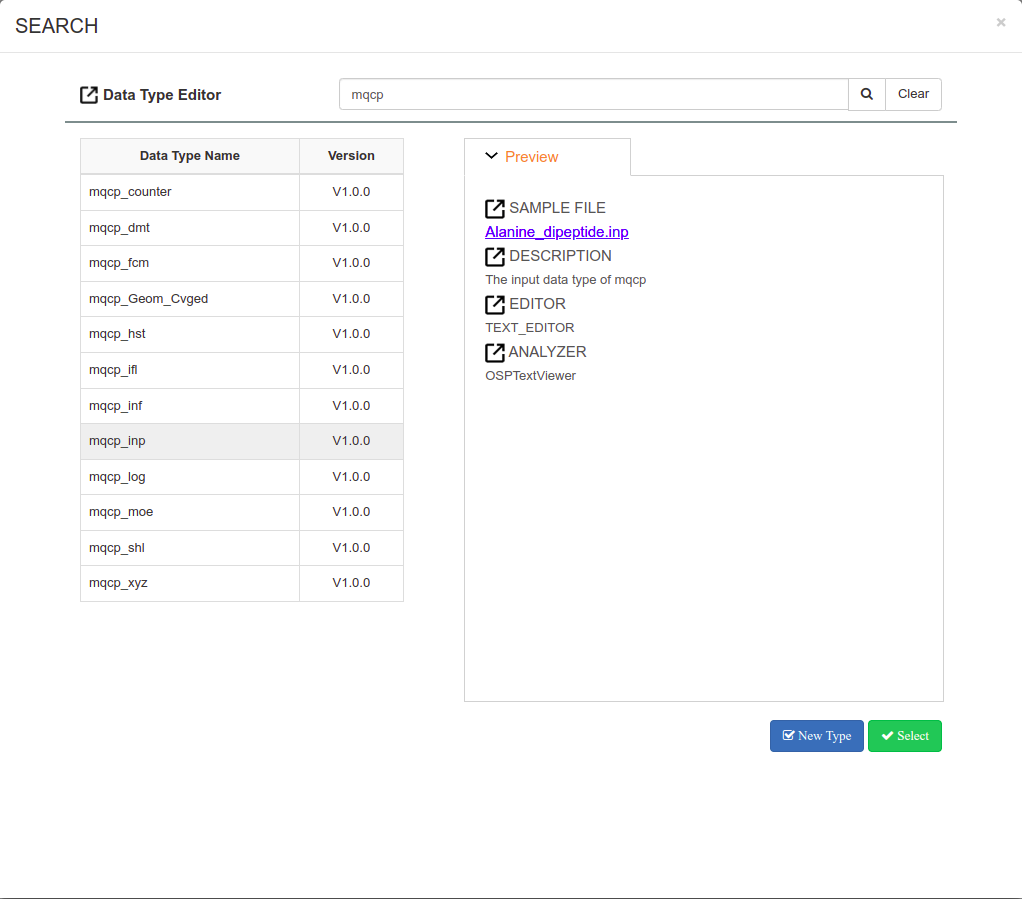
Clicking on Select button to confirm you choice of input parameter.
The command line of your application will be updated accordingly:

In the next tab, Layout, you shall choose the desired view of your application.

In the last tab, Public Data, you need to provide some description of your
application for other users of Edison platform.
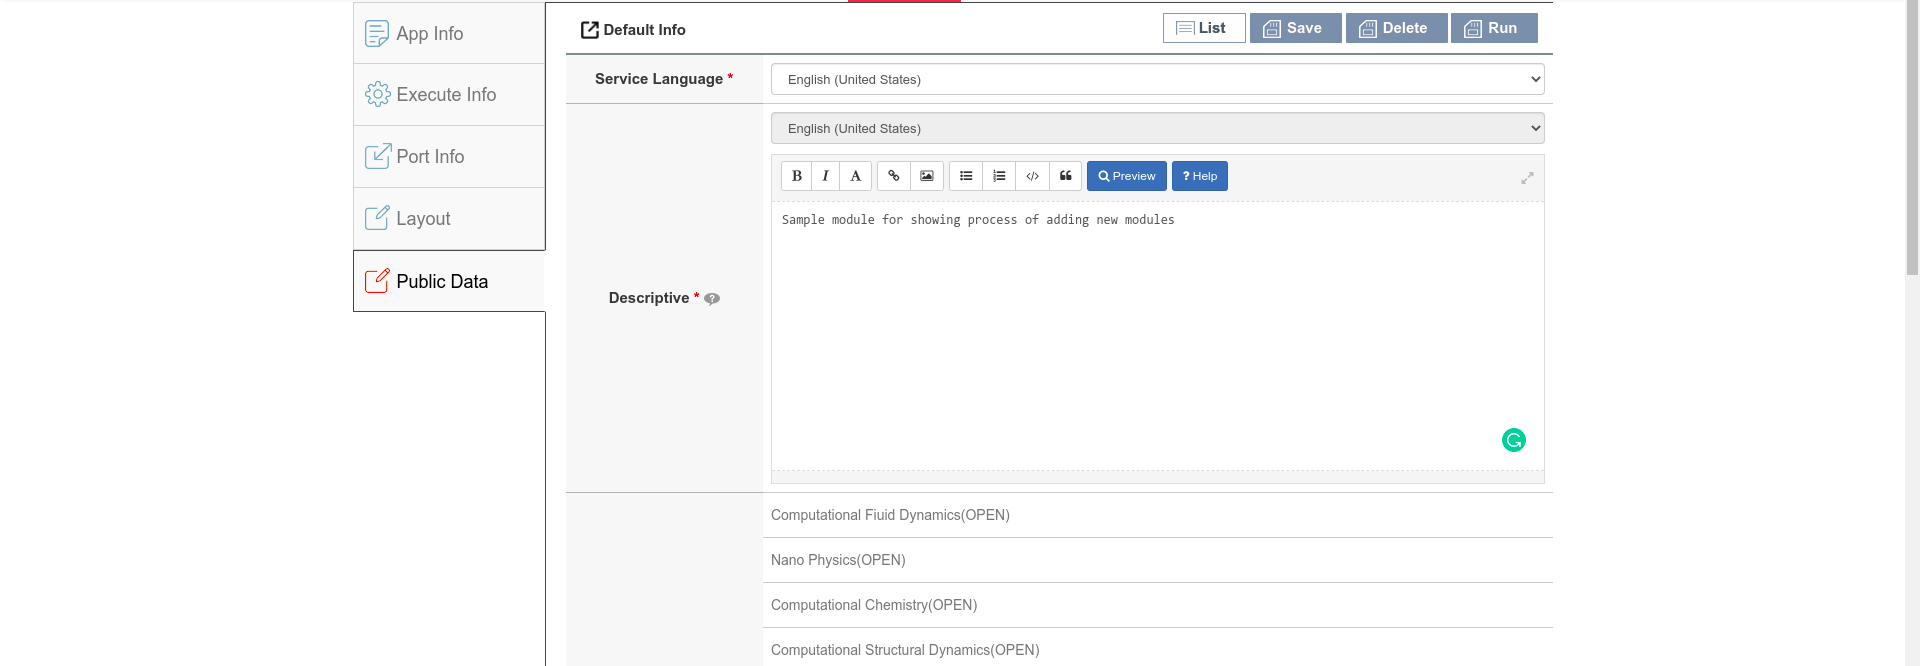
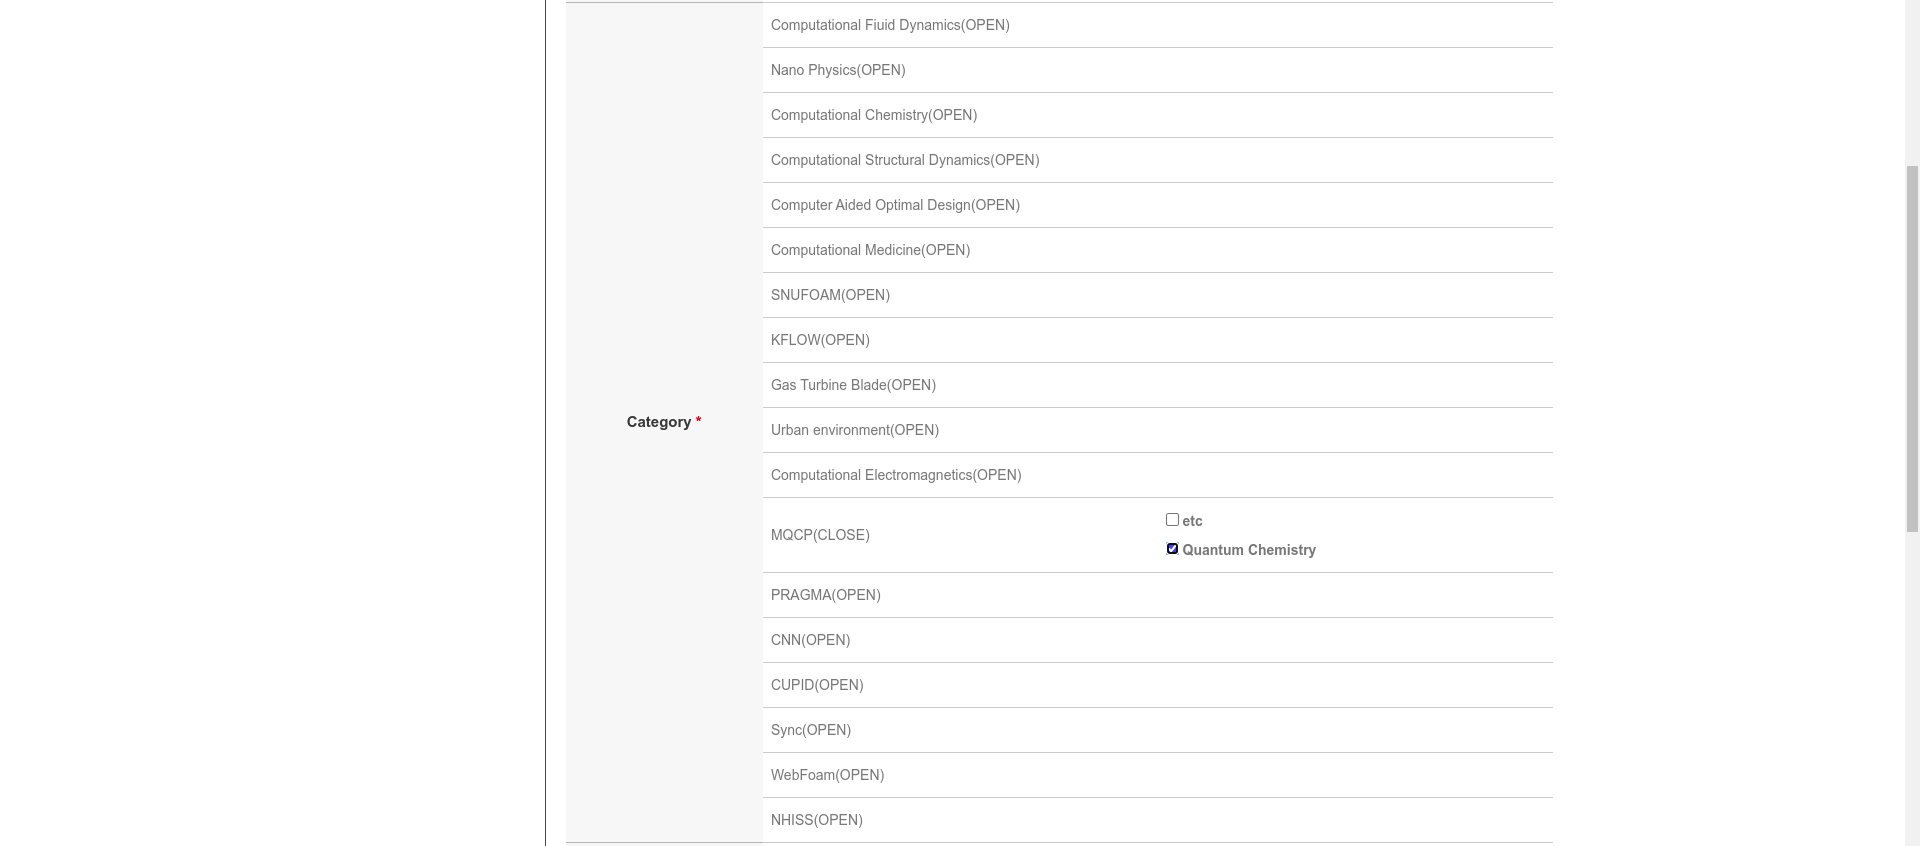
For category, you shall choose MQCP -> Quantum Chemistry
For manual, you shall provide website (as it is in screenshot) or file.
It was the last step when you shall click on save.
Now, you can see your new application in My Assets tab.
You can edit it by clicking on application for changes.
